The focus of the tutorial will be to utilize the
File type field capabilities of the Enterprise Store extension framework to store a simple csv file with an asset.
For the sake of brevity I have not included the steps needed to display the download links in the Governance Center Store.This tutorial deals primarily with the alterations needed for the Publisher UI.
The complete set of resources used in this tutorial can be accessed
here[2].
Prerequisites
- WSO2 Governance Registry 5.2.0
Our Goal
We will define an Applications asset type that we allow a user to upload a test plan when the application is created in the Governance Center Publisher.
How can we achieve this goal?
- Define a field as a file field to store the test plan
- Provide a link to download the file
Where will the file be stored?
Any fields that have been marked as a file field will have the contents of the file stored in the registry and referenced via the field name.
How are file served?
The files are served through a storage controller [1] which utilizes a combination of asset type, asset Id and the field name to access and serve the file from the registry.
What file types are supported?
The number of supported file types is relegated to those defined in a map
here [7] , however this can be increased by adding more types to previously mentioned map.
Step 1: Define a field as a file field
For this tutorial we will be utilizing the applications asset type which is available in the companion git repository
here [3] .
In order to support the test plan to be uploaded with the asset we will create a new table for Tests and define a field named plan that will be used to store the test plan file. However, at this point we run into a major issue: the RXT schema does not support file type fields.
What can we do?
The Governance Registry Extension file schema does not provide a means to define a file field type.This is achieved through a mechanism in the Enterprise Store extension framework which enriches the field types list.
In the RXT definition we will simply define the plan field as a text field (as far the Governance Registry is concerned there is no concept of a file field type):
To define the field as a file type we will create an asset extension [4] which will alter the behaviour of the plans text field. In the asset.js file we define the following configuration to achieve this change [5]:
When this extension is deployed it will override the field type from text to file. It is important to note that the concept of a file field type exsists only within the context of the Governance Center Publisher and Store applications.
Step 2: Provide a link to download the file
We will need to alter the view template (defined as a Handlebars template file) in order to provide a download link to the file:
The download link is a dynamic URL of the following form:
/storage/{{type}}/{{id}}/{file_field_name}
Example
https://172.17.0.1:9443/publisher/storage/applications/1c71ae62-7325-4ad0-85f7-25faa80ebf25/tests_plan
- type: The asset type (e.g. applications)
- id: The asset id (e.g. 1c71ae62-7325-4ad0-85f7-25faa80ebf25)
- file_field_name: The name of the file field (e.g. tests_plan)
Step 3: Restart the server
Final Result
When you restart the server you should see the applications asset type in the type list:
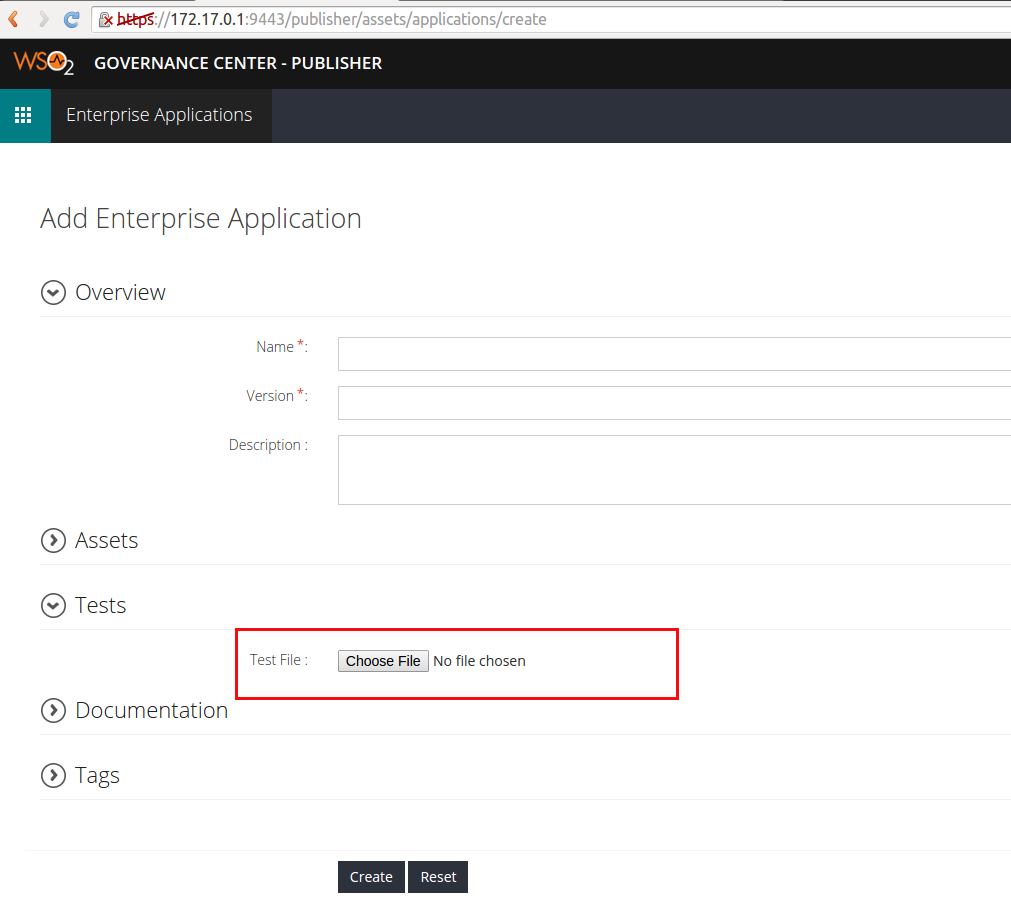
In the applications create page you will be presented with a file browser:
After the asset is created the download link will appear in the asset details page:
References
[1] https://github.com/wso2/carbon-store/blob/master/apps/publisher/controllers/storage-router.jag
[2] https://github.com/splinter/es-tutorial-2
[3] https://github.com/splinter/es-tutorial-2/blob/master/applications.rxt
[4] https://github.com/splinter/es-tutorial-2/tree/master/applications
[5] https://github.com/splinter/es-tutorial-2/blob/master/applications/asset.js
[7] https://github.com/wso2/carbon-store/blob/master/jaggery-modules/utils/module/scripts/file/file.js#L22